
How to Use Clipart in Digital Scrapbooking
A Beginner's Guide to Creative Memories
4/17/20252 min read
If you love collecting beautiful clipart and digital elements, why not turn them into keepsakes? Digital scrapbooking is the perfect way to use your favorite designs while documenting life’s sweet moments. Whether you’re preserving family memories, travel adventures, or just the joy in everyday life, this post will show you how to transform clipart into stunning digital scrapbook elements you’ll love creating and sharing.
What Is Digital Scrapbooking?
Digital scrapbooking is just like traditional scrapbooking—but instead of scissors and glue, you use digital files and software. It’s clean, creative, and completely customizable. Plus, you can share your layouts online, print them into photo books, or keep them on your device as digital memory albums.
Why Use Clipart in Scrapbooking?
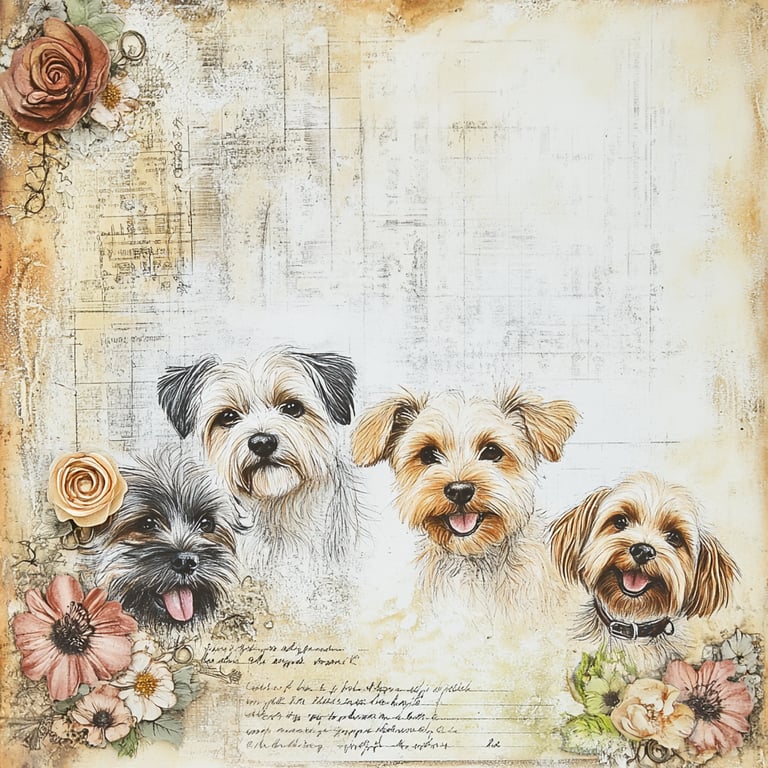
Clipart adds personality, color, and visual interest to your pages. From flowers and animals to decorative borders and cute phrases, you can build your own creative world with just a few PNGs. Bonus: no mess, and you can reuse your favorites again and again!
How to Get Started with Digital Scrapbooking
Step 1: Gather Your Materials
Clipart files (transparent PNGs work best)
Backgrounds or digital paper (optional but helpful)
Digital scrapbooking software or apps (see below)
Photos you want to highlight
Recommended Tools
Canva: Super beginner-friendly, drag-and-drop interface
Photoshop or Photoshop Elements: More advanced, great for control and layering
Procreate (iPad): Awesome for freehand drawing or layering with a stylus
Step 2: Choose a Theme or Memory
Before you start adding elements, decide what story you want to tell. Here are a few easy themes to try:
A weekend getaway
Your pet being adorable (again!)
Seasonal snapshots (like spring blooms or cozy fall days)
Family game night or movie night
Step 3: Build Your Layout
Start with a blank canvas or a premade scrapbook layout template (Canva has tons!). Add your photo or photos first, then start layering your clipart around them. Play with:
Frames and borders
Florals or foliage
Banners and titles
Fun doodles or icons (hearts, stars, paw prints, etc.)
Drag, resize, and rotate until everything feels just right. There’s no wrong way to scrapbook—it’s all about making it yours.
Step 4: Add Text or Captions
Use text boxes to add:
Dates
Names
Short descriptions
Funny quotes or inside jokes
Choose fonts that match the mood—playful, handwritten, or clean and modern. Try layering text over a piece of clipart to create a unique title banner.
Step 5: Save and Share
Once you're happy with your page:
Save it as a high-resolution JPG or PNG
Print it out for a physical scrapbook
Upload it to Instagram, Pinterest, or a family photo album
Combine multiple pages into a digital photo book
Bonus Tips:
Mix and Match: Don’t be afraid to use clipart from different packs! Just keep an eye on color schemes so everything looks cohesive.
Stay Organized: Create folders for each project so you can find your clipart and photos quickly.
Try a Challenge: Set a timer and give yourself 20 minutes to make a quick page. Sometimes constraints spark the best creativity!
Ready to Get Started?
Check out the latest clipart packs at Etsy—from cozy seasonal sets to playful icons, they’re perfect for adding joy and color to your scrapbook layouts. And don’t forget to tag us if you share your pages online—we LOVE seeing what you create!
Happy scrapbooking,
The Stickyzen Team